
The goal of this blog post is to get you up and running using OpenAI and NodeJS as quickly as possible. I am making the following assumptions:
- Vanilla Javascript – You want to use vanilla Javascript and not TypeScript.
- OSX – You are using OSX (a Mac). Windows setup is similar but I don’t cover it here.
- Run from Terminal – You want to run your OpenAI code by executing your code from Terminal. Creating a web app requires additional steps.
Step 1 – Ensure You have NodeJS installed
You can find the official installers for both MacOS and Windows at the official NodeJS website. When I wrote this post, I had NodeJS v20.11.1 installed. You can check your version by executing the following command from Terminal:
node --version Step 2 – Create a New Folder for Your App
Create a new folder for your voicemail greeting app. You can call the folder anything you want:
mkdir MyApp
cd MyApp
Step 3 – Create Your package.json File
You need your package.json file to configure your NodeJS application. Execute the following command from terminal in the folder that you created in the previous step:
npm init es6 -y This command creates a package.json file in the current folder. It also tells NodeJS to use ECMAScript modules instead of the default CommonJS modules. The -y option causes the file to be generated without requiring human interaction.
Step 4 – Install the OpenAI NPM Package
We need to install the official OpenAI NodeJS library to make it easier to interact with the OpenAI APIs from NodeJS:
npm install openaiStep 5 – Setup Your OpenAI API Access Key
Calling the OpenAI APIs costs you money. OpenAI tracks this with your OpenAI API Access Key which you can get from https://platform.openai.com/api-keys.
You should set up your key once on your computer so it is available in all of your projects automatically. Here’s how you can update your Zsh configuration file on a Mac.
Use the nano editor to create or edit your Zsh configuration file:
nano ~/.zshrcEnter the following line into the file:
export OPENAI_API_KEY='your-api-key-here'Press Ctrl+O to write the changes, followed by Ctrl+X to close the editor.
You need to restart Terminal so it can pick up on the configuration changes. Alternatively, you can execute the following command:
source ~/.zshrcYou can verify that your key is now available to all of your apps by executing the following command:
echo $OPENAI_API_KEYStep 6 – Create a Basic OpenAI App
We are going to write an app that asks ChatGPT for the “answer to life, the universe, and everything.”
Create a file named meaning-of-life.js and add the following code:
import OpenAI from "openai";

const openai = new OpenAI();

async function main() {
  const completion = await openai.chat.completions.create({
    messages: [{ role: "user", content: "What is the meaning of life, the universe, and everything?" }],
    model: "gpt-4-turbo-preview",
  });

  console.log(completion.choices[0].message.content);
}

main();
The code above contains a function named main() that calls the GPT 4 Turbo model with the user message “What is the meaning of “life, the universe, and everything.” When the function returns, the result is displayed to the screen using console.log().
Because the call to the API is asynchronous, the main() function is marked as async. When you use the await operator, you must mark the containing function as async.
Step 7 – Run the OpenAI App
Finally, we can run our app and get our answer to the meaning of life. Execute the following command from Terminal:
node meaning-of-life.jsYou should get a reply similar to the following from ChatGPT:
According to Douglas Adams' science fiction series "The Hitchhiker's Guide to the Galaxy,"
the answer to the ultimate question of life, the universe, and everything is simply "42."
However, in the story, the actual question is never discovered, rendering the answer somewhat
meaningless yet humorously profound. Philosophically and scientifically, the meaning of life
and the universe remains an open question, subject to various interpretations based on
different beliefs, theories, and perspectives.
Extra Credit – Using VS Code
My favorite code editor is Visual Studio Code (I used to work with the person at Microsoft who created the original version of VS Code as a weekend project). This code editor is free and it works great for building OpenAI applications.
You can download Visual Studio Code from the following website:
https://code.visualstudio.com/
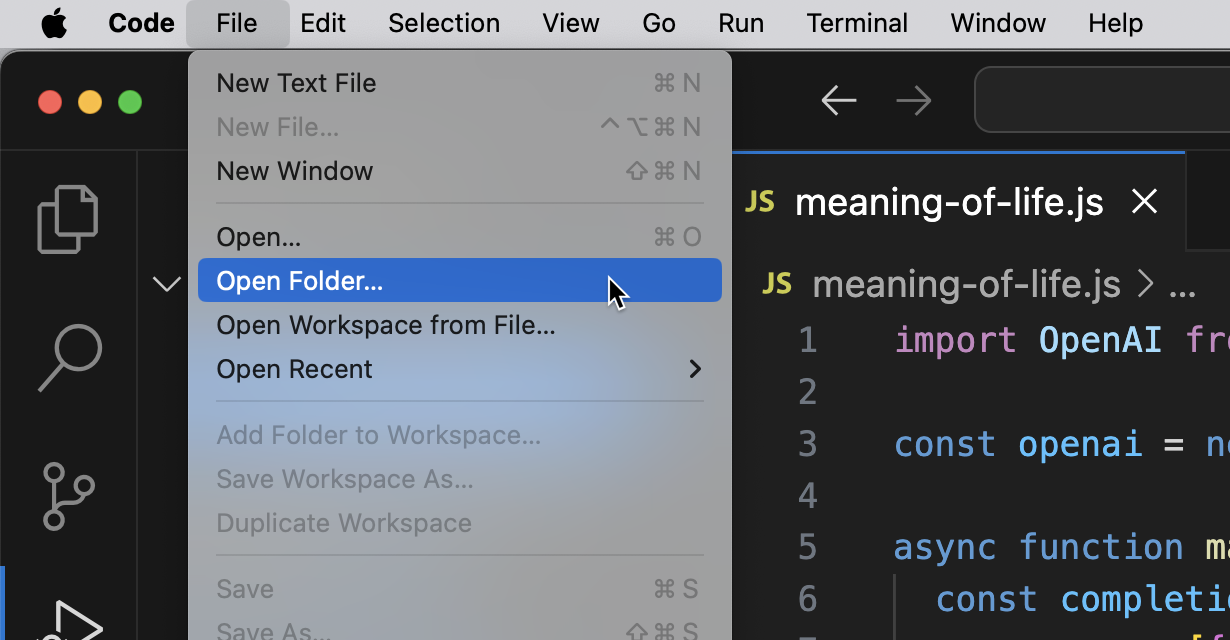
After installing and launching Visual Studio Code, you can open any folder on your computer by using the File, Open menu item:
You can open a NodeJS terminal by clicking the Run and Debug icon on the left side of the editor. Next, click JavaScript Debug Terminal and this will open a new Terminal window on the bottom of the editor:
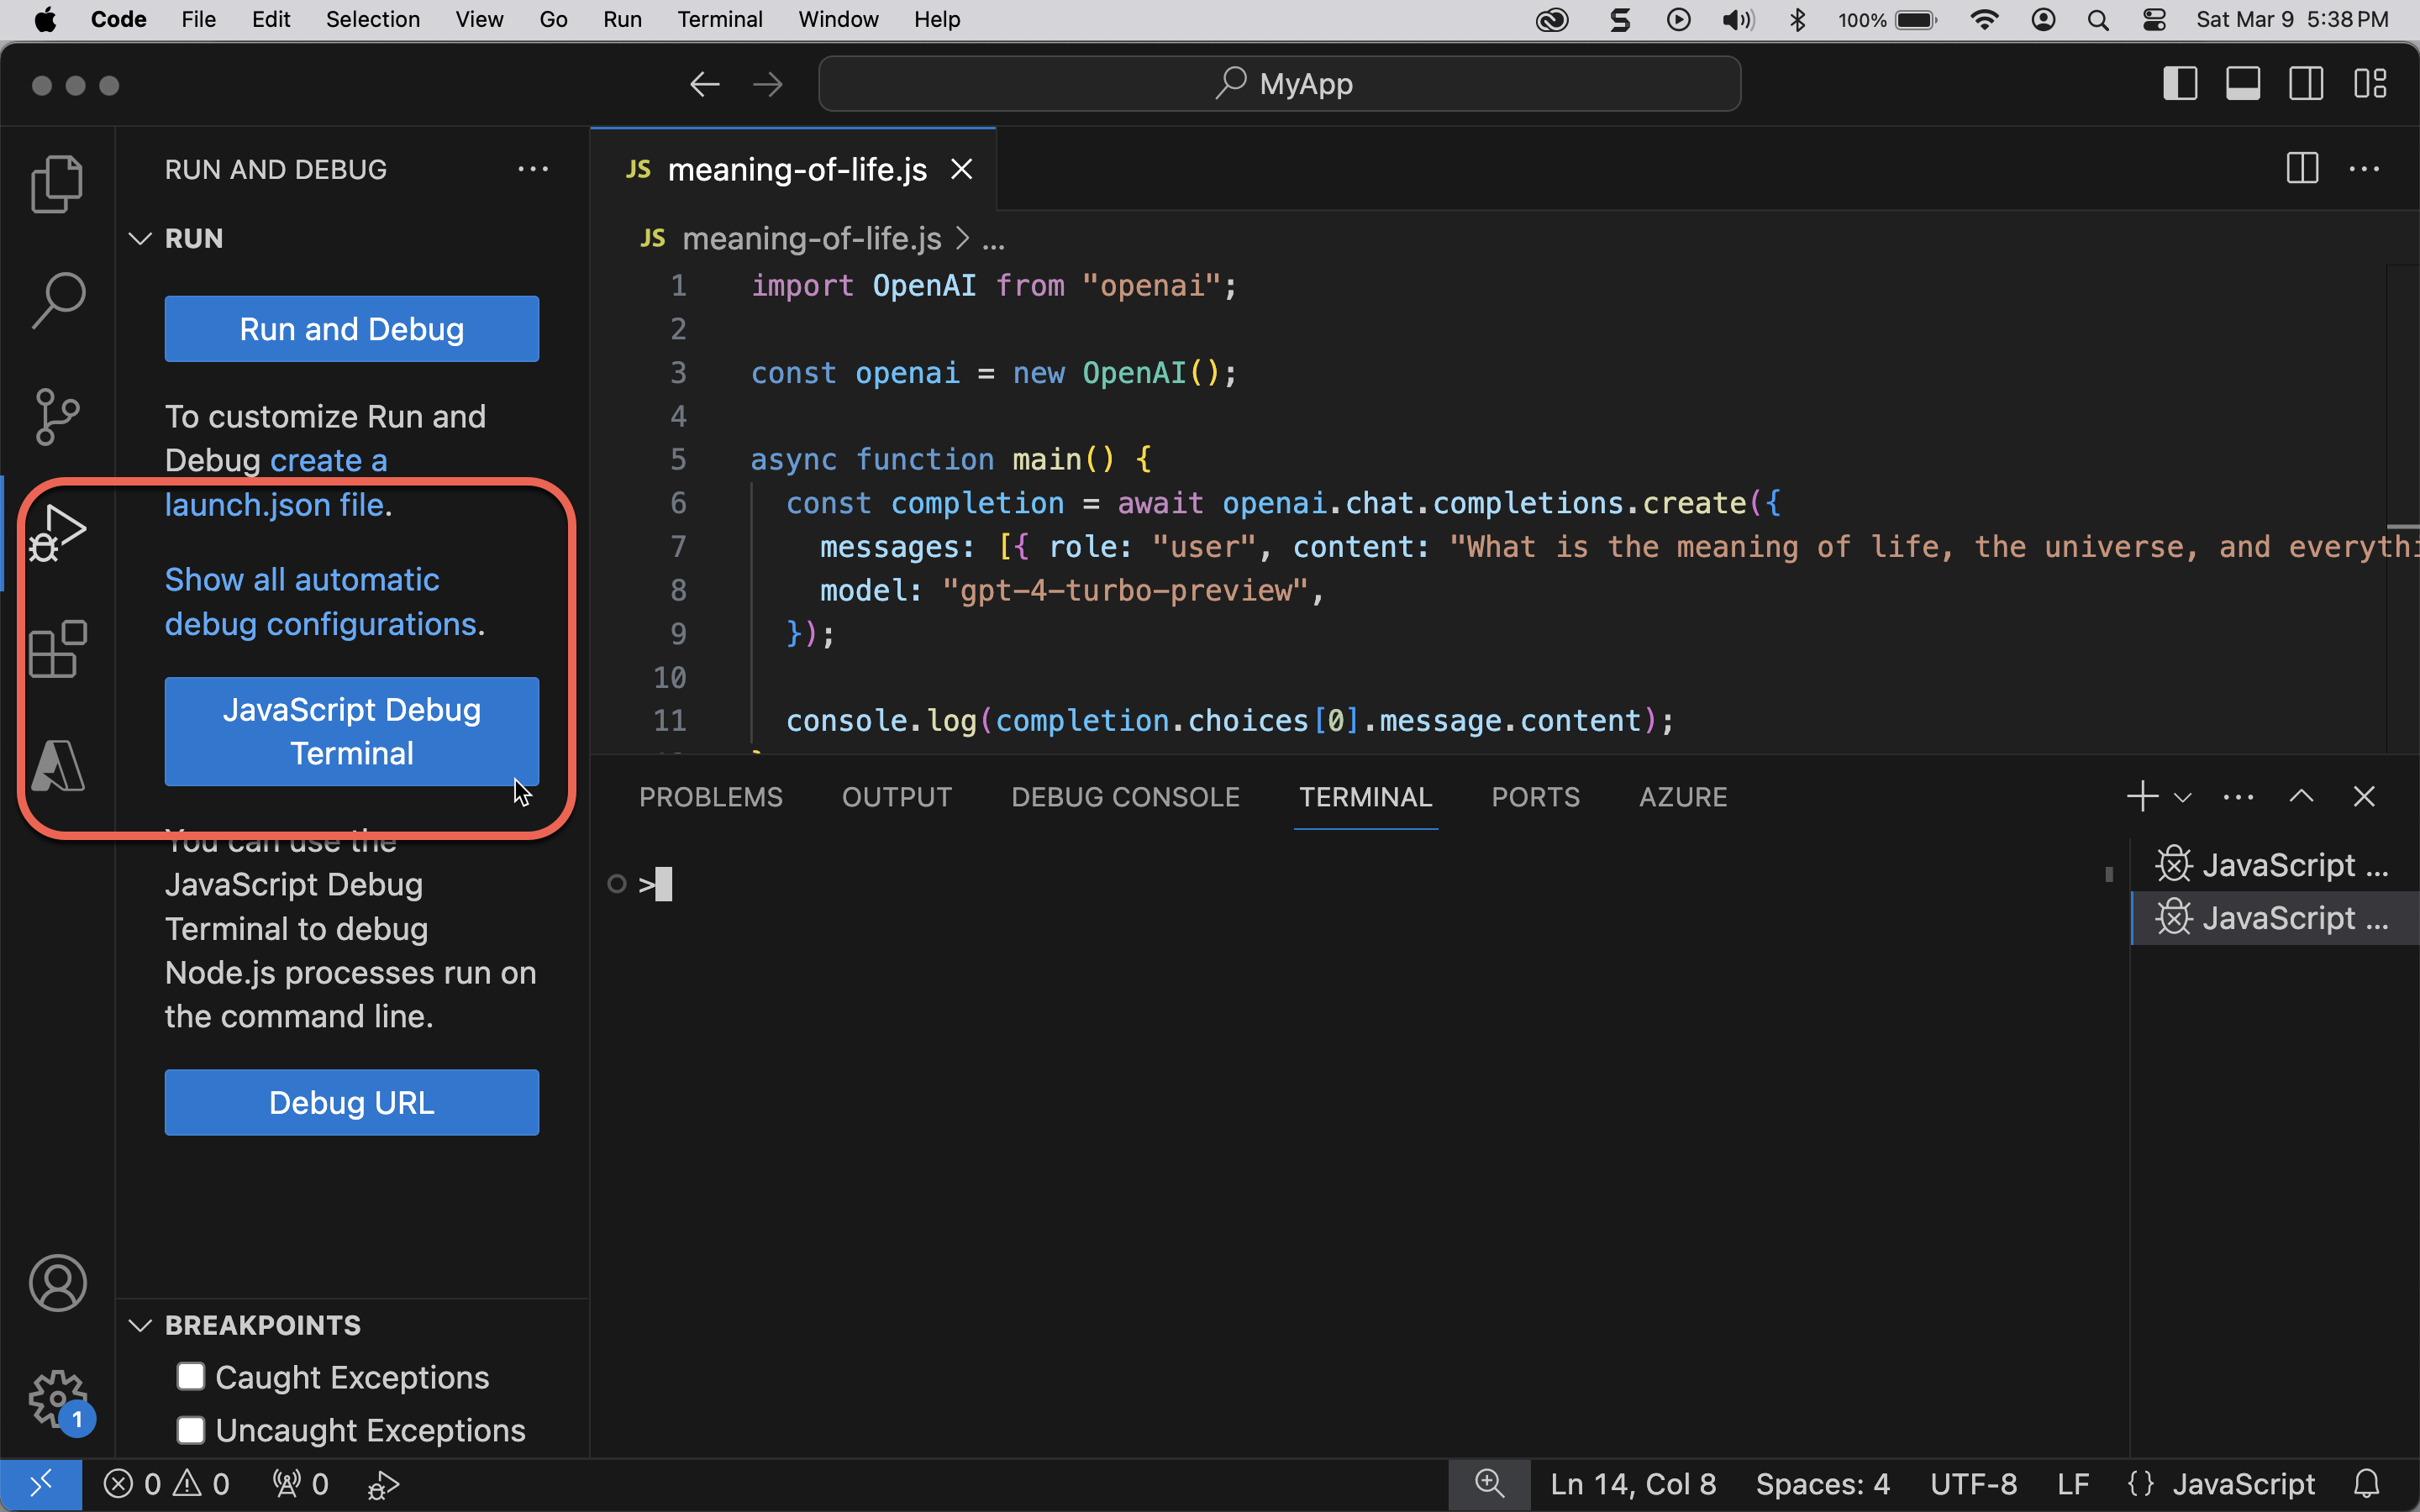
Type the following command into the Terminal to run your OpenAI app:
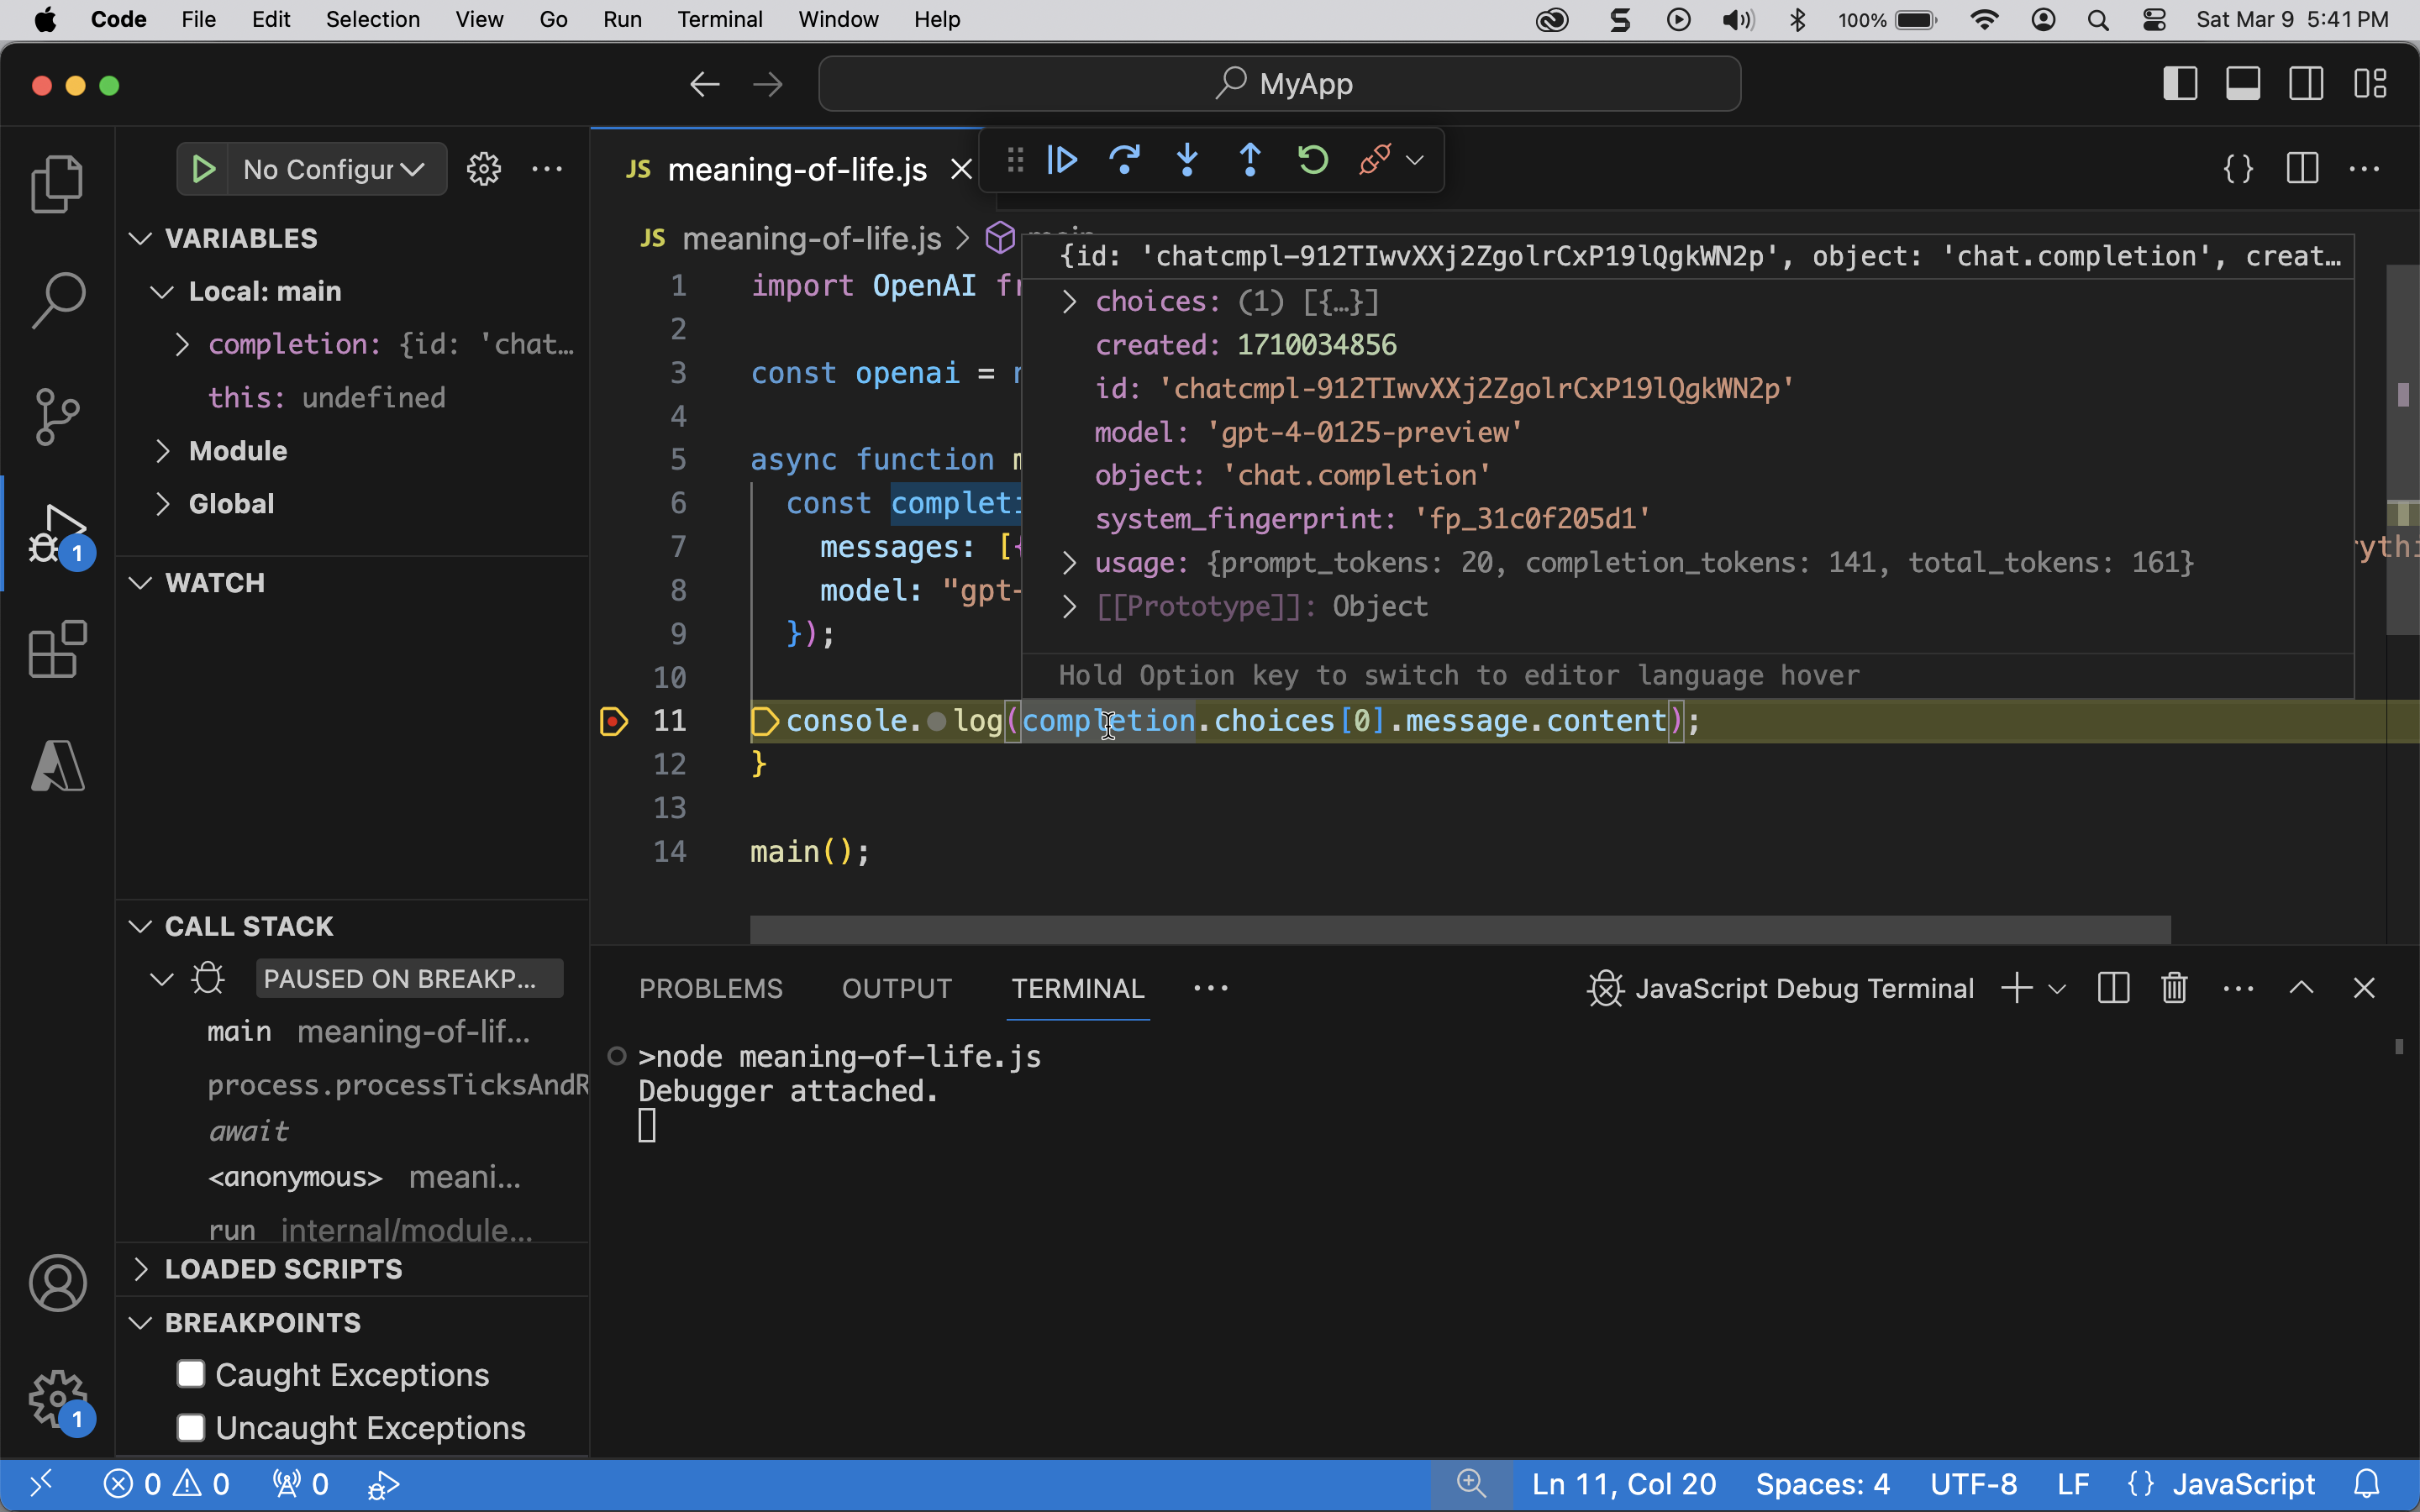
node meaning-of-life.jsWhen you run your code within the JavaScript Debug Terminal, you can set breakpoints in your code so you can step through your code and view the values of your variables. To set a breakpoint, just click to the left of a line of code in the code editor.
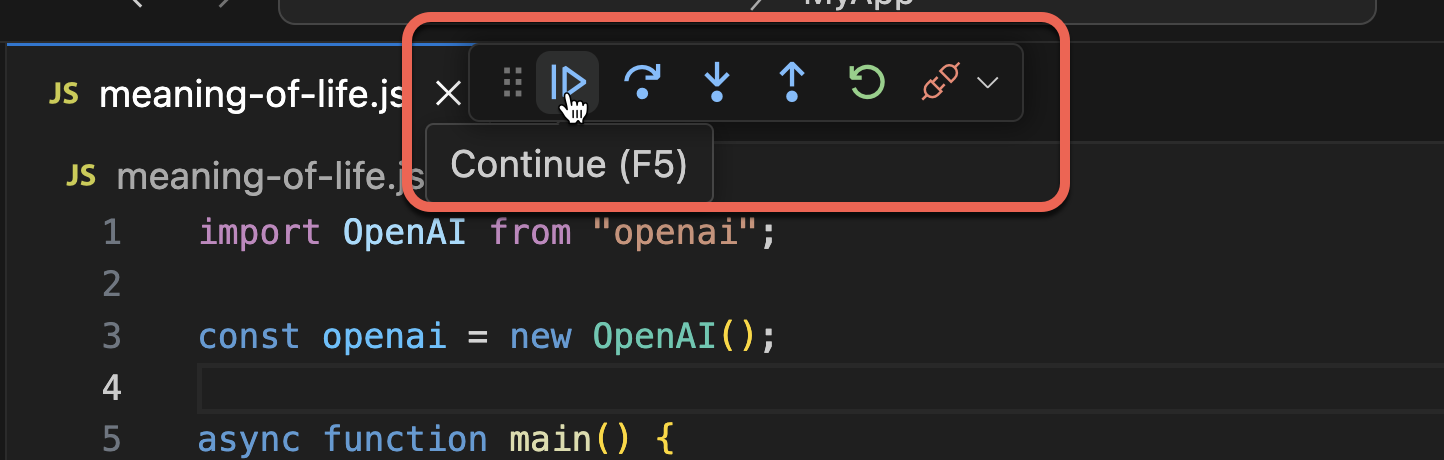
Use the Debug toolbar that appears at the top of the editor to step through your code (or hit fn+F5).
Summary
This blog post described how to setup and run a simple OpenAI/ChatGPT app in less than 15 minutes. As a bonus, we also got an “answer to the question of life, the universe, and everything.” This is the very first step in an exciting journey. In the coming weeks, I plan to dive into a number of additional OpenAI topics.
Thanks. Worked as advertised. But since I’m running on windows I set the api key like this:
const openai = new OpenAI({ apiKey: ‘myapikeyhere’});
And also this article got me clued in as to how to use the VS Code debugger.
Thanks Bart! Glad you found the post useful.